Xtra Edge Action Camera Timelapse: Is It Easy?
The Xtra Edge Action Camera makes timelapse setup straightforward with scene presets, custom intervals, estimated video length, and a physical start button.
Affiliate disclosure: As an Amazon Associate I earn from qualifying purchases. This article may contain affiliate links, which means I may earn a commission at no extra cost to you.
If you want an action camera for a project timelapse, the Xtra Edge Action Camera gets the important part right: it gives you a simple path from “I’ll be out here for hours” to “I want this to become a reasonably watchable video.” I set it up for a fence-building timelapse, and the Custom mode was the useful bit—not just a pile of settings for the sake of settings.
The Xtra Edge Action Camera is a practical pick if timelapse is your priority. Its presets and Custom mode make it easy to plan a long capture around the video length you actually want.
As an Amazon Associate I earn from qualifying purchases.
| Primary use | Tripod-mounted timelapse capture |
|---|---|
| Timelapse modes | Hyperlapse and standard Timelapse |
| Timelapse options | Custom, Golden Lapse, Skylapse, Street Lapse |
| Custom control | Adjustable capture intervals |
| Planning aid | Estimated resulting video length on screen |
| Start method | Physical upper button |
The camera offers standard Timelapse, Hyperlapse, and several scene-specific timelapse choices. More importantly, it shows how your interval choice changes the approximate finished video length. That is the kind of information that saves you from recording five hours of activity and ending up with a clip that is over before anything interesting happens.
Who should consider the Xtra Edge Action Camera timelapse mode?
I’d look at this camera if you want to record a long, mostly hands-off activity: a construction project, yard work, a changing sky, or street movement. You do not need to be deeply technical to get into the timelapse controls, but you do need to think through your composition and how long the event will run.
It is especially suited to someone who wants choices. If you want a quick starting point, the camera includes Golden Lapse, Skylapse, and Street Lapse options. If you already know your shooting window and the length of video you want at the end, Custom is the better route.
That distinction matters. Presets are convenient. Custom control is what makes an action camera more useful for a real project instead of just a sunset on vacation.
My setup experience: from tripod to capture
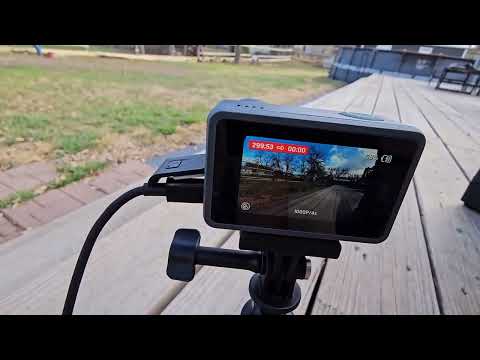
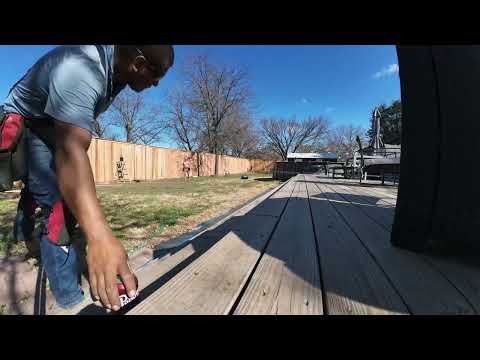
I mounted the Xtra Edge Action Camera on a small tripod for a fence-building project. That is a very normal action-camera use case: put it somewhere stable, frame the work area, start the capture, and get out of the way.
From the touchscreen, I used the lower-left on-screen control to get into the camera’s capture options, selected Timelapse, then swiped upward to reach the relevant settings. The navigation was direct enough that I could move through it without turning the setup into its own project.
Inside the mode menu, I found Hyperlapse and Timelapse. Within the Timelapse section, the camera presented Custom, Golden Lapse, Skylapse, and Street Lapse. The names are self-explanatory, which is a good thing. Cameras already have enough labels that sound like they came from a software beta.
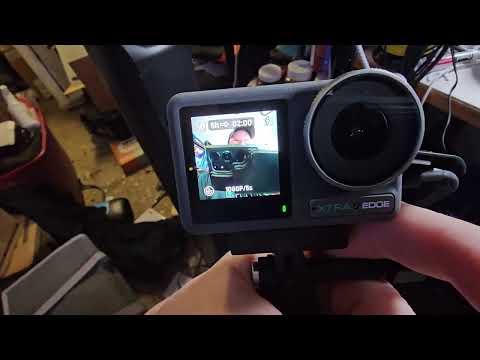
I chose Custom because the fence work was expected to run for about five hours. From there, I could adjust the planned capture duration and the interval between captures. As I changed the interval, the camera displayed an estimate of the resulting video length.
That on-screen estimate is the standout practical feature here. Timelapse is all about compressing time. If the camera helps you understand that tradeoff before you press record, it is doing useful work.
Custom intervals are the reason this mode is useful
With the Custom option, I could work backward from the result I wanted. Rather than choosing an interval blindly, I could consider the full shooting period, select an interval, and see the approximate duration of the finished clip. I set it up around the goal of making a roughly two-and-a-half-minute video from a five-hour project.
That is a better workflow than simply hitting timelapse and hoping for the best. Longer intervals can make the final sequence longer, while shorter intervals compress more activity into less screen time. The right setting depends on what you are recording:
- Active work projects: A wider view and a planned capture period help show meaningful progress.
- Clouds and changing light: The dedicated scene options may be the quickest starting point.
- Street activity: Street Lapse gives you a purpose-built option without requiring immediate manual setup.
- A specific edit length: Custom mode is where you should spend your time.
To be clear, I did not treat Hyperlapse as the same thing as standard Timelapse. The camera offers both, and I focused my setup on the regular Timelapse menu and its Custom settings. If you know you need one particular look, check the selected mode before you start. A few seconds there can prevent a long capture in the wrong format.
Starting a long capture is refreshingly simple
Once I had the camera positioned outdoors and the settings chosen, I started the timelapse with the physical upper button. I like that arrangement for a tripod-mounted camera. Touchscreen menus are great for setup; a physical button is better when the camera is already framed and you do not want to bump it around at the last second.
After I started it, the display showed an initial captured image/count along with a recording-duration indicator. In practical terms, that gives you a quick confirmation that the camera is actually working before you walk away.
For unattended shooting, that is the workflow I want: frame it, confirm it has begun, and leave it alone. The camera does not need to be dramatic. It needs to make the boring part dependable and obvious.
+ Pros
- Several scene-oriented timelapse presets alongside a Custom option
- Custom intervals can be planned around a desired finished-video length
- On-screen estimates make interval choices easier to understand
- Physical start button works well once the camera is tripod-mounted
! What to know
- Custom mode is the best fit when you know both the planned capture period and your target final-video length.
- Golden Lapse, Skylapse, and Street Lapse are faster scene-based starting points.
- For very long shoots, confirm your own power and recording requirements before leaving the camera unattended.
What the scene presets add
The Golden Lapse, Skylapse, and Street Lapse choices are useful because they lower the barrier to getting started. Not everybody wants to calculate intervals on every shoot. Sometimes you just want to capture the clouds moving across a sky or activity rolling through a street scene.
These presets also make the camera friendlier for someone who is learning. You can begin with a scene-oriented option, see how it fits your subject, then move to Custom once you have a specific target length in mind.
I would not buy an action camera based only on preset names. But as part of the timelapse workflow, they are a sensible addition. They provide a fast lane, while Custom remains the lane for people who want control.
Specs
| Spec | Detail |
|---|---|
| Product | Xtra Edge Action Camera |
| Capture modes observed | Hyperlapse and Timelapse |
| Timelapse presets observed | Custom, Golden Lapse, Skylapse, Street Lapse |
| Timelapse adjustment | Capture interval selection in Custom mode |
| User interface | Touchscreen controls with swipe-up settings access |
| Recording feedback | Capture count/status and recording-duration indicator |
What I would plan before using it for an all-day project
The camera’s interface helps with timing and interval decisions, but your setup still matters. A construction timelapse is not just a camera setting. It is placement, framing, weather exposure, and making sure the activity will remain in the shot as the work moves along.
Use a stable tripod or mount. Pick a view wide enough that people and materials do not immediately disappear out of frame. Then set the interval based on the duration you want from the final video—not just on the total time you expect the project to take.
I did not evaluate finished image quality, battery runtime, available resolutions, frame rates, or external-power options in this setup. If you are planning an especially long recording, those are details worth confirming for your own workflow before committing to an overnight or multi-day capture.
Also, take the few extra seconds to watch the status display after pressing start. I could see the recording-duration indicator and capture status, which is the easiest way to avoid walking away before the sequence has begun.
Is this the right action camera for timelapse?
For someone shopping specifically for an easy timelapse workflow, the Xtra Edge Action Camera has the right ingredients: standard Timelapse, Hyperlapse, scene presets, adjustable intervals, estimated video duration, touchscreen setup, and a physical start button.
The big win is not that it has a Custom setting. Lots of products can have settings. The win is that the Custom workflow connects the interval choice to an estimated final-video length. That makes the menu easier to use for a real five-hour project.
If you only want an action camera for fast handheld clips, this feature set may not be the deciding factor. But if you want to put a camera on a tripod while something unfolds over time, it is a meaningful reason to consider it.
Scorecard
Direct touchscreen path to timelapse settings.
Custom intervals pair with final-length estimates.
Scene-based presets offer quick starting points.
Physical start button is convenient after framing.
FAQ
Does the Xtra Edge Action Camera have a standard timelapse mode?
Yes. I accessed a Timelapse option in the camera’s menu, separate from Hyperlapse. Within Timelapse, I found Custom, Golden Lapse, Skylapse, and Street Lapse choices.
Can I change the interval for an Xtra Edge Action Camera timelapse?
Yes. In Custom mode, I adjusted the capture interval and saw on-screen estimates for how those choices would affect the length of the resulting video.
Can I use the camera on a tripod for a long project?
Yes. I mounted it on a small tripod for an outdoor fence-building timelapse and started the sequence using the physical upper button.
What are Golden Lapse, Skylapse, and Street Lapse?
They are scene-oriented options inside the camera’s Timelapse menu. They are intended as quicker starting points alongside the more adjustable Custom option.
Does the camera show that timelapse capture has started?
Yes. After starting the capture, I saw an initial capture count and a recording-duration indicator on the display.
Final recommendation
I’d recommend the Xtra Edge Action Camera to people who want a straightforward way to turn a long event into a short timelapse. The preset choices are convenient, but the Custom mode and its video-length estimates are the features that make it practical.
Set a stable frame, decide how long you want the final clip to be, use the interval estimate as your guide, and start it with the physical button. That is a simple workflow—and for timelapse, simple is usually exactly what you want.
As an Amazon Associate I earn from qualifying purchases.